Maps of PaxLair and the Realm
Maps of the Realm are extremely important for navigating and understanding our environment. We present here several maps of PaxLair and other locations in a manner to accomplish this. These maps are "Zoomified" so you can see an entire area at a glance or zoom in to see a particular building or landscape feature. When events occur in some areas, the people in those events are also added to bring the map to life.
If you are interested in mapping your area, see the information at the bottom of this page. If you create a map of your area and want it published here, please send a link to your large map, full screen size, downloadable file (.bmp) to
This e-mail address is being protected from spam bots, you need JavaScript enabled to view it
- we will zoomify it and publish it here.
PAXLAIR CITY, FELUCCA (September 2007)
(A City of the PaxLair Statehood - 75-57N 26-09E, Felucca)
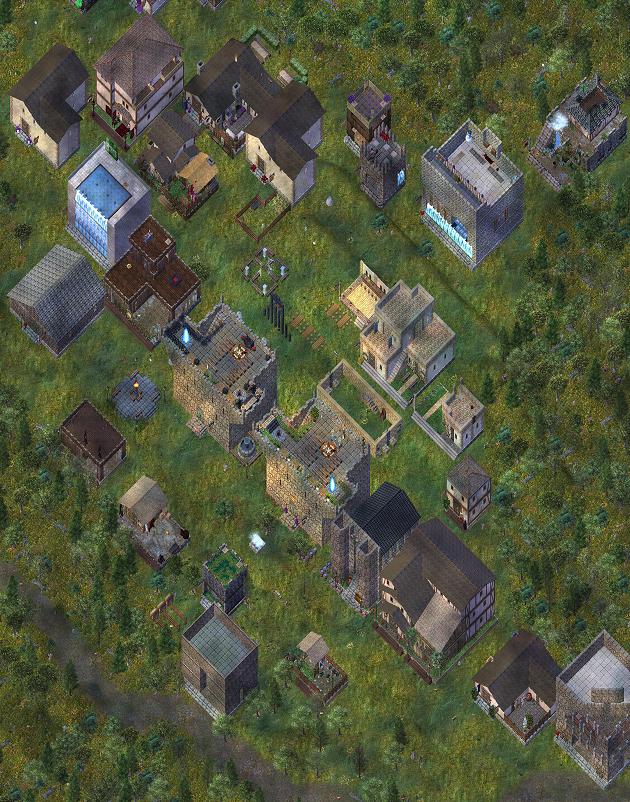
Zoomify Map - 1024x768 or 1280 x 1024
|
OLAG HAI AND KAAR BARASHALU ORC FORT, FELUCCA (February 2006)
(Part of PaxLair City - , Felucca)
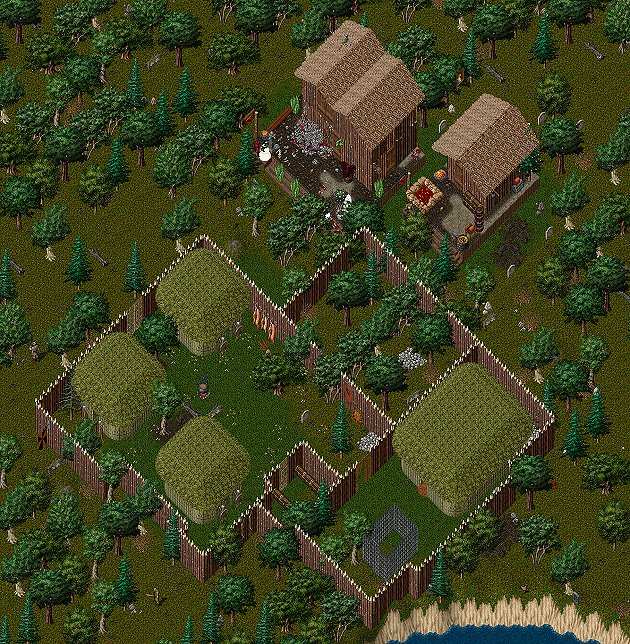
Zoomify Map - 1024x768 or 1280 x 1024
|
DRAGONS WATCH, FELUCCA (coming soon)
(A City of the PaxLair Community - 138-26N 129-26E, Felucca)
|
DRAGONS WATCH OUTPOST, TRAMMEL (February 2006)
(Part of Dragons Watch - 70-02S 11-19W, Trammel)

Zoomify Map - 1024x768 or 1280 x 1024
|
PAXLAIR OUTPOST, MALAS (April 2005)
(Part of the PaxLair Community - 35-31N 03-18E, Orc Fort, Malas)

Zoomify Map - 1024x768 or 1280 x 1024
|
PAXOKU, TOKUNO (January 2007)
(A City of the PaxLair Community - 93-53N 66-56W, Homare-jima, Tokuno)

Zoomify Map - 1024x768 or 1280 x 1024
|
PAXLANE, TRAMMEL (coming soon)
(A Town of the PaxLair Community - 24-20S 33-02W, Trammel)
|
PAXGLACEI, MALAS (February 2006)
(Part of the PaxLair Community - Hall of Justice - 132-54N 38-48W, Malas)

Zoomify Map - 1024x768 or 1280 x 1024
|
PORT BALDMOR, TRAMMEL (January 2006)
(Home of the Pirates - A Town of the PaxLair Community - 155-07S 74-27E, Bald Isle, Trammel)
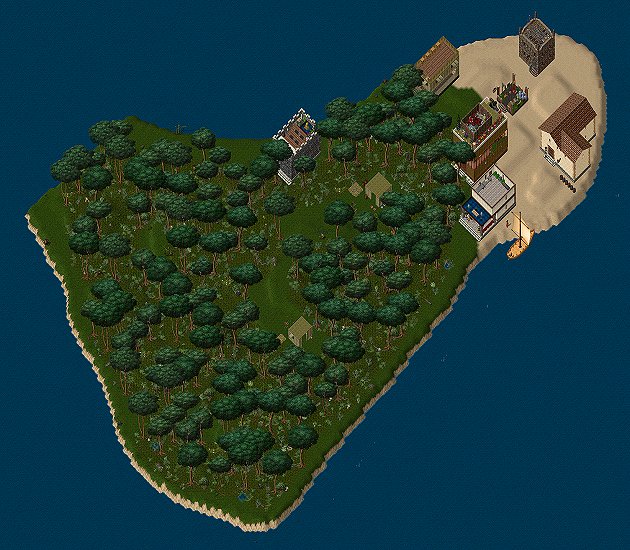
Zoomify Map - 1024x768 or 1280 x 1024
|
Details on How to Create These Maps
We created the maps as follows. Most large maps take about 30 hours to create.
Software: We use PaintShopPro (PSP) to capture images and create the huge image file while walking around in the Realm; we cut and paste (in layers) and align pixels to match by zooming in within PSP. We then flatten the layer and save. We do this repeatedly for each screen shot.
1. In PSP, we created a blank file of about 6000 x 3000 pixels as the base file, which is about a 15 MB .jpg or 25 MB .psp file.
2. Go to a place in the Realm (step on building to load it, or stand in a forest area).
3. Do a screen shot.
4. Insert the screen shot as a Layer in PSP in the base file.
5. Zoom in and slide the layer slightly to line up to another image already inserted into the base file. We have to zoom in a lot, to the pixel level, and align the layer.
6. Flatten the layers so all is one layer.
7. Move a little, take another screen shot, add the layer, slide the layer to the right spot, zoom in, align the pixels adjacent to it, flatten the layers.
Just keep doing that for any area, including those without houses.
In some areas, it is easier to be a ghost, use UO Assist to display yourself as a chicken which lets you see color. Make sure Night Sight was on before you died if it was nighttime.
Make sure to take another little image in a spot near where you were, so you can crop out a small piece to insert over your "chicken" character, otherwise you will have dozens of "chickens" in the map at regular intervals.
Mountains are very hard, because you can't see all the mountain usually. Thus, we put in "signs" on the mountain areas that had blank spaces.
We used highest window size in the UO client for the screen shots.
When doing a building, it takes about 4 screen shots for a normal size house, from each corner, crop out the character from the image. Dense areas of housing is hard, as need to try step on two houses to load them at once. Hard with some large houses, and have to do more precise imaging and cropping.
The whole process is EXTREMELY tedious, but once done, if there is a house update, it is easy to make changes fast by just imaging that house again.
Remember to keep a master backup of a final file you make. 30 hours of work is precious; updates are easy, but keep the master file intact.
Other Software: Basically what we are doing is Panoramic image alignment. There seem to be some programs out there to do this automatically (take pictures of the sky in sequence, have a program line up the pixels where they match). We have not researched Panoramic image alignment software enough yet to turn this from a 30 hour project to a 5 hour project.
Finally, you Zoomify the map and upload it. See www.zoomify.com
How to Reduce the Large Maps into something smaller and of high quality
The large maps, once created in Paint Shop Pro or other graphics program, can be reduced in size to fit on a single web page.
This is done by:
1. Resize the image to a new size that will appear properly in a web page. This will blur a lot of the image, so you have to then sharpen it.
2. Incrementally increase the contrast of the image. In Paint Shop Pro, it is called "Sharpening". Sharpening can be done until the image looks crisp, but does not get overly sharpened to make it have a lot of white dots around the images.
3. Save the resized image as a new JPG file (BE CAREFUL NOT TO OVERWRITE YOUR ORIGINAL LARGE IMAGE, OR YOU WILL DESTROY HOURS OF EFFORT WITH YOUR ORIGINAL MAP!!!) - Always keep a back up copy of your original map somewhere before you start doing a lot of manipulations for different publishing.
I hope this helps!
Winfield, Mayor of PaxLair
|


